Skeleton2Animation in Aseprite
A downloadable skeletons in Aseprite for Windows and macOS
Requires Aseprite version 1.3.x or higher
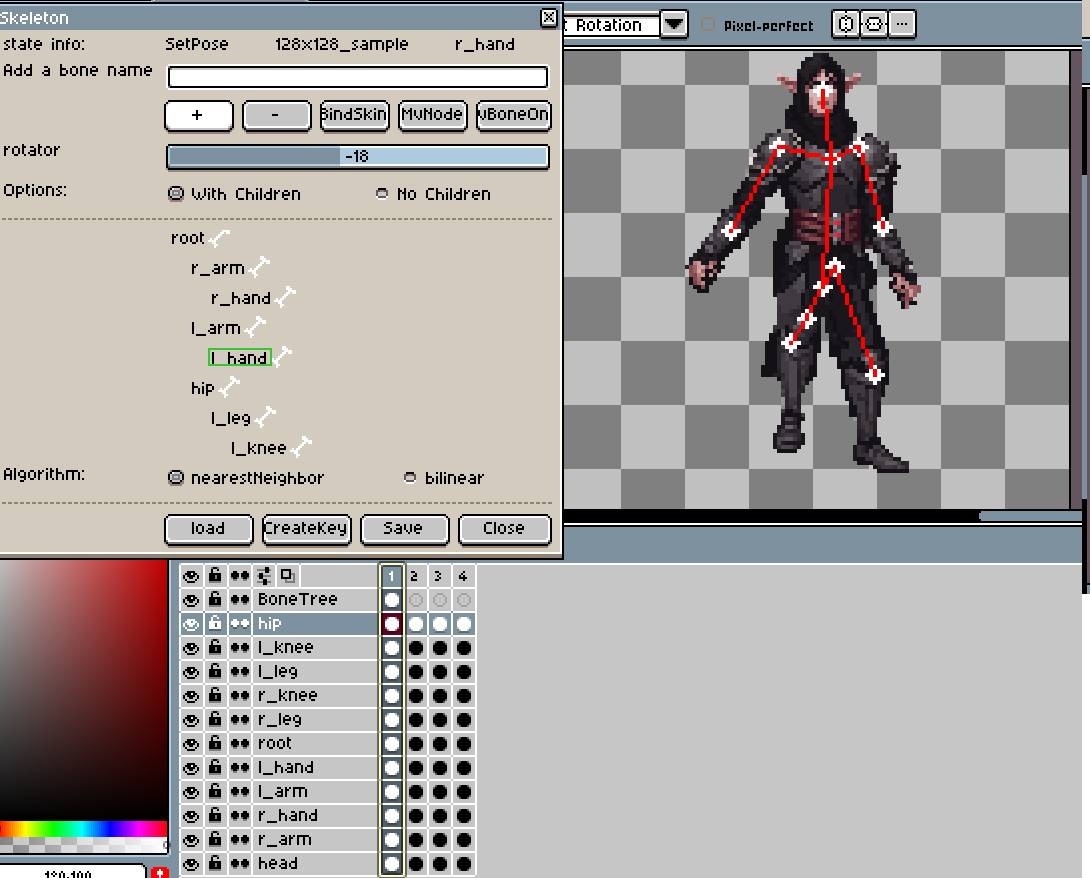
Create skeleton nodes and bind image as skin is Aseprite
1,Bind Skin to Bone:
Select the desired region on the source sprite image ( source image should be same size as skeleton sprite image )
In the skeleton canvas, select the corresponding bone.
Click Bind Skin to bind the skin image to the bone.
2,Adjust Bone Node Position and Offset:
Click MvBoneOnly and move the mouse over the circle of the bone node and drag it to appropriate location,Click MvNode for moving the selected bone node with skin image, the children nodes position will also change if the option No Children unchecked )
3,Rotate Skin Image:
Select the bone in the skeleton canvas.
Use the Rotator Widget to rotate the skin image around the selected bone node(self or parent or ancestor node)
4,Insert a New Bone:
In the skeleton canvas, select an existing bone to be the parent of the new bone.
Input a name for the new bone.
5,Click + to add more bones.
6,Create animation frames:
Click Create Key to save the current layer as a new frame.
Download
Click download now to get access to the following files:
Development log
- Skeleton2Animation in AsepriteMay 12, 2025


Comments
Log in with itch.io to leave a comment.
Hey that seems to be a really nice project, but I'm having some trouble importing the source sprite image, how can I import it?
Using same size as temple defined, like 64*64 , 128*128, 256*256, you can also add new size in script (refer to line 22 : local sizes = ,and make a poses's coordinate template with it)
The script is a demo to binding layers and rotate sprites, but have not considered to making animations smoothly so far